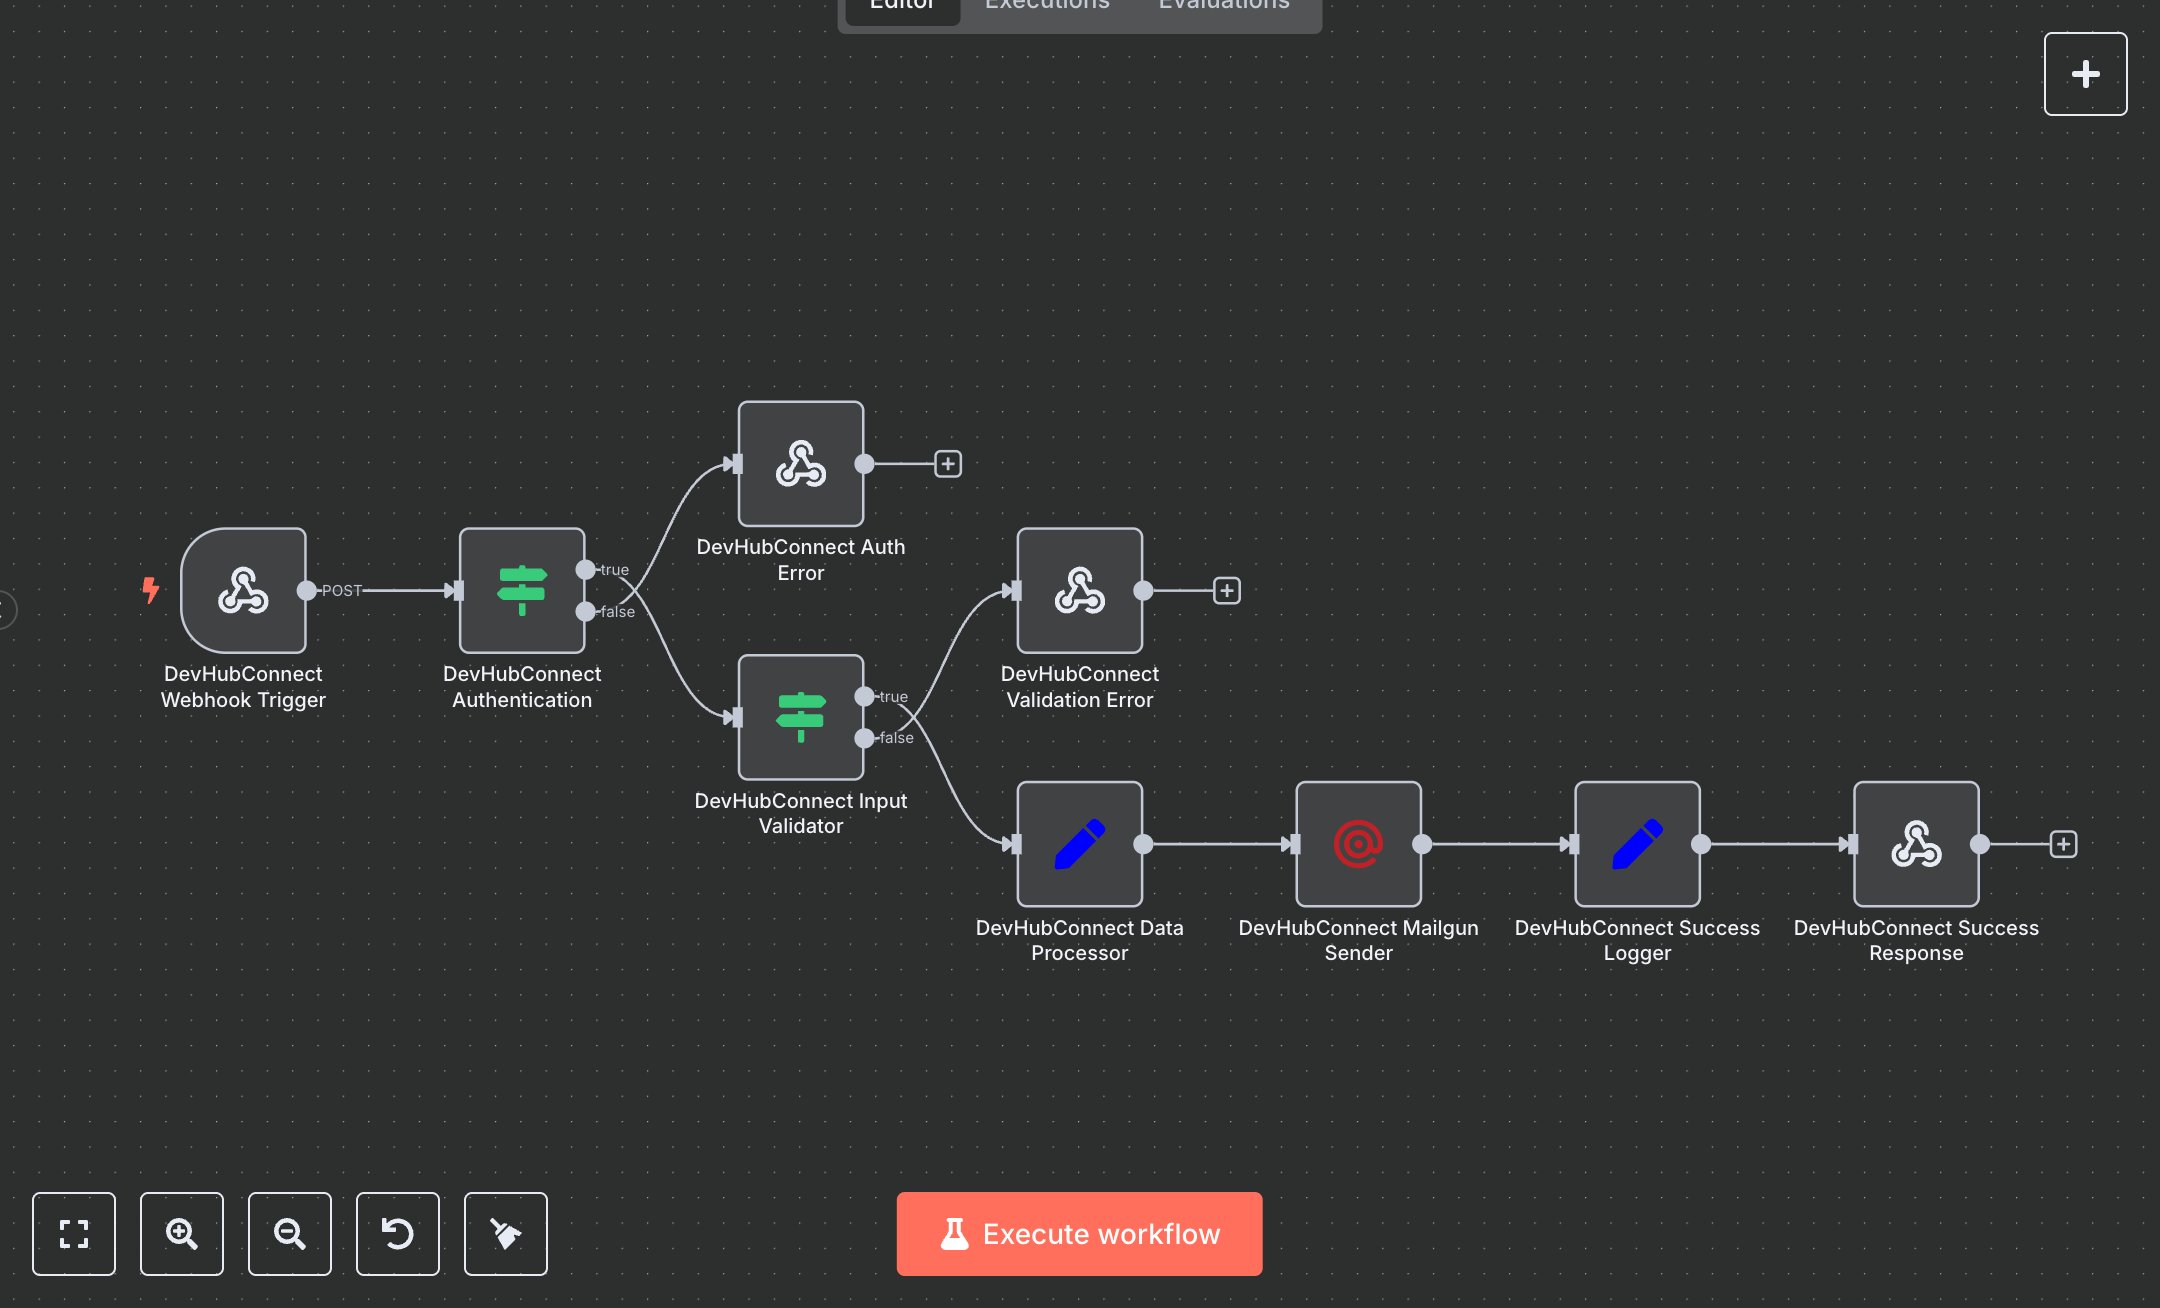
Secure & Automated Email Sending: Powered by Mailgun
This workflow automates email sending via Mailgun, processing incoming requests, validating data, and logging results. Key nodes include Webhook, Condition, Set, Mailgun, and Respond to Webhook, leveraging the Mailgun API for reliable email delivery. To set up, install n8n from n8n.io for self-hosting or sign up at cloud.n8n.io for a hosted solution. Create a Mailgun account at mailgun.com, add a sending domain, and obtain an API key from the Mailgun dashboard under 'API Keys'. Configure this key in the Mailgun node ('Mailgun Sender') using the Mailgun API credentials option. Ensure your domain is verified in Mailgun to enable sending. Set the Webhook node’s path to 'email-automation' and enable HTTPS for secure communication. In the Webhook node, configure the HTTP method to POST and add a custom X-API-Key header for authentication. The Set node ('Data Processor') requires input fields: toEmail, fromEmail, subject, and optionally content or htmlContent. Test the workflow by sending a POST request to the Webhook URL with a JSON body containing toEmail, fromEmail, and subject. Validate the output in the Respond to Webhook node, checking for 'success: true' and a Mailgun messageId. If errors occur, such as a 401 (missing or invalid API key), verify the Mailgun API key in the credentials section. For a 400 error (missing required fields), ensure the JSON payload includes toEmail, fromEmail, and subject. Check Mailgun’s logs for delivery issues. Deploy by activating the Webhook node and integrating it with your application to send emails programmatically. Monitor the Success Logger node’s output for requestId and messageId to confirm successful email delivery. This setup ensures secure, automated email sending with Mailgun, suitable for transactional or marketing campaigns.
$3.49
Workflow steps: 9
Integrated apps: webhook, if, respondToWebhook